Introduction
One big advantage of coresuite cube is, that it is based on Microsoft SQL Server and Analysis Services. But why is this an advantage? For standard software, there are much more 3rd party products like iPad apps available. And its perfectly integrated into the Windows environment, which nearly every company uses. In this blog, I want to show you, how it is possible to make roles with permissions and link them to Active Directory users or groups with a few mouse clicks.
Scenario
For setting up some roles and permissions, we use the coresuite sales cube. The goal is to set permissions to different sales employees. We distinguish between:
- Management Group: Can see everything in the sales cube, there are no filters applied
- Bernhard Peterhans: Can only see his own sales
- All the other Windows Users: Can’t see anything
For the setup of roles and permissions, there are always the same steps:
- Step 1: Add role
- Step 2: Give permissions to cubes
- Step 3 (if necessary): Give dimension permissions
- Step 4: Assign Windows user / group to the role
Setup “Management Group”
Can see everything in the sales cube, there are no filters applied
Step 1: Add role
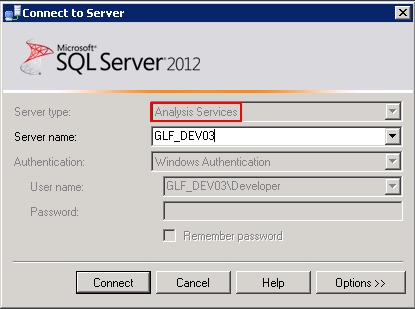
coresuite cube runs on Microsoft Analysis services, so it is necessary to open the SQL Server Management Studio and connect to the Analysis Services:
Each cube solution has a separate cube database. We browse to the sales cube, which is indicated by “coreCubes_Sales_[YourName]”. In the roles, we delete the Default group, which was installed by the cube installer and gives permission to everyone.
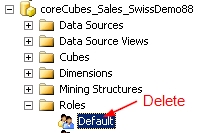
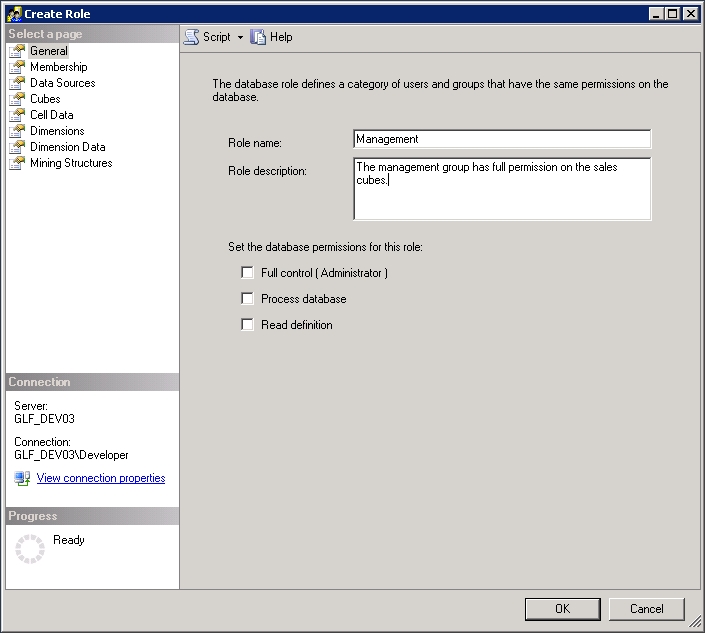
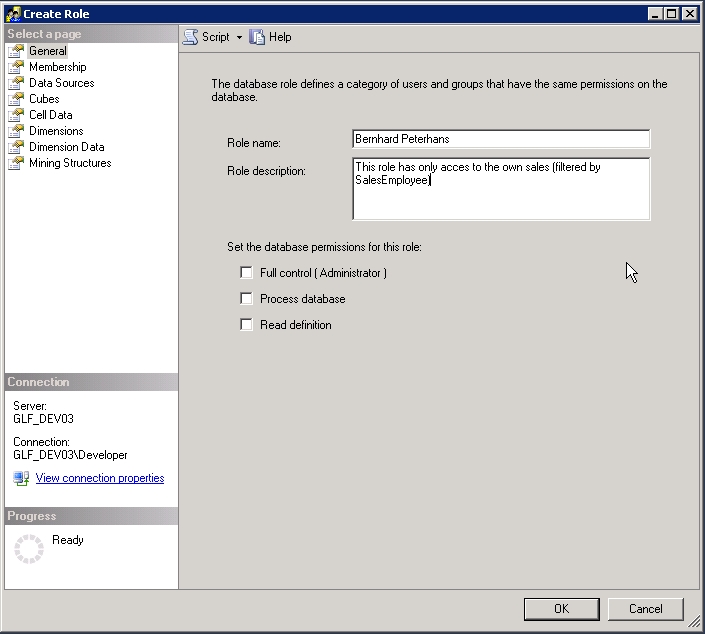
We add now via right click a new role and name it with Management:
Step 2: Give permissions to cubes
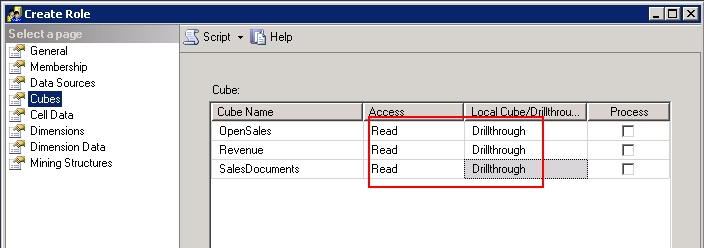
The next step is to define, which cubes can be browsed by this group. In this example, we give read-Access to the 3 cubes. Additionally, the users are enabled to have the DrillThrough function (for example in Excel).
Step 3: Give dimension permissions
Not necessary for the Management group: This group has no restrictions.
Step 4: Assign Windows user / group to the role
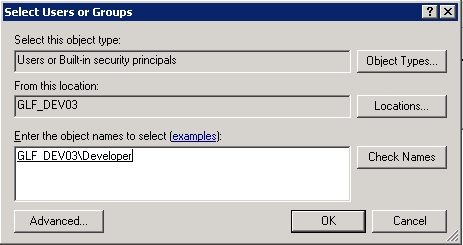
The last step is to link this role to a Windows AD user or group by browsing to Membership. Using the Add button the form Select Users or Groups opens.
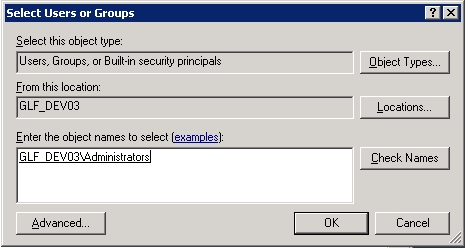
It is possible to choose Object Types, for example users or groups. It is also possible to choose Locations, which is usually necessary, if users or groups are managed in certain domains. In the print screen above, the group Administrators is assigned to this role.
Setup “Bernhard Peterhans” (sales employee)
More interesting than setup “full” permissions is to restrict information to certain users or groups. As introduced, Bernhard Peterhans should only see his sales.
Step 1: Add role
The procedure to add the role Bernhard Peterhans is the same as already done in the Management group.
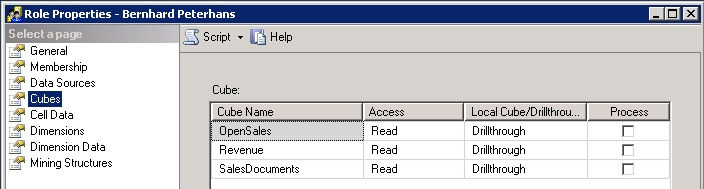
Step 2: Give permissions to cubes
This sales employee should have permissions to all 3 cubes like the Management role.
Step 3: Give dimension permissions
This step is the interesting step. In all 3 cubes (OpenSales, Revenue and SalesDocuments), we need to restrict. The restriction can be done under Dimension Data. Under Dimension choose a cube and then the SalesEmployee dimension:
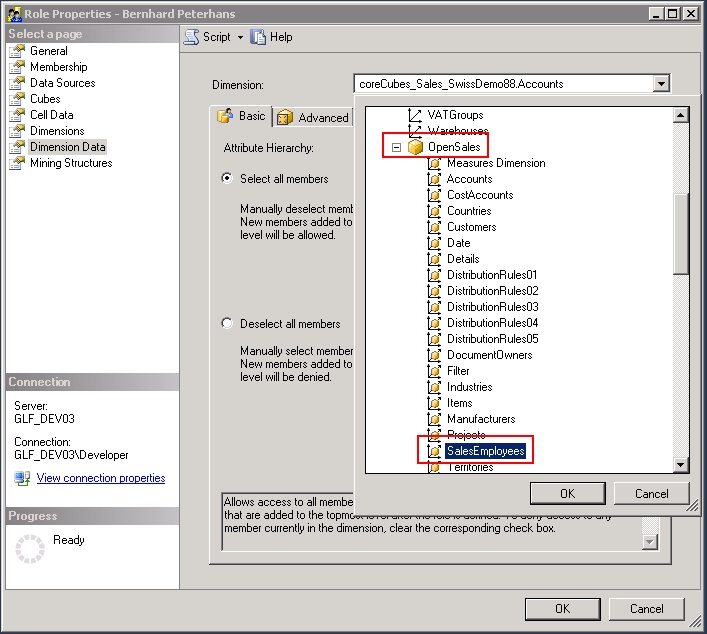
In our case, we need to deselect all members on the left and then give only data for Bernhard Peterhans:

Now, the sales employee has only access to his dimension data when browsing the cube. A last property must be set to get it work with correct totals: Browse to Advanced and set the flag under Enable visual totals.
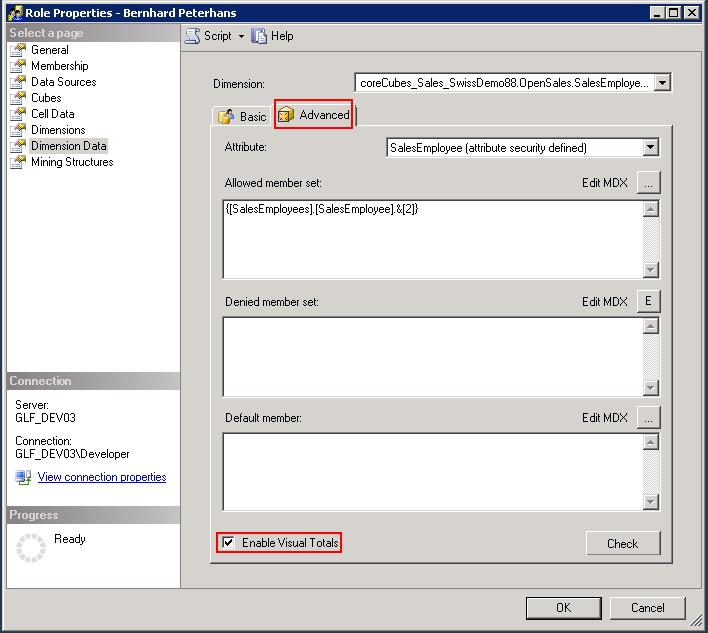
Now, the permission is completely set for the OpenSales cube.
Important: To restrict the access for all the 3 cubes, go back to the start of step 3 and choose also the Revenue and SalesDocuments cube.
Step 4: Assign Windows user / group to the role
The last step is to assign the Windows user to the role. In this example, I just use the user developer:
Result
Now, the Management has full access to the cube. Berhard Peterhans has only access to his sales. And nobody else has access to see any data. Now it would be possible to ask Bernhard Peterhans to connect to the cube and give feedback if everything looks OK. But we can test it also by ourselves.
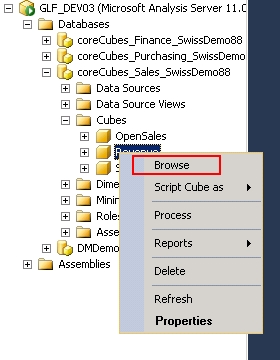
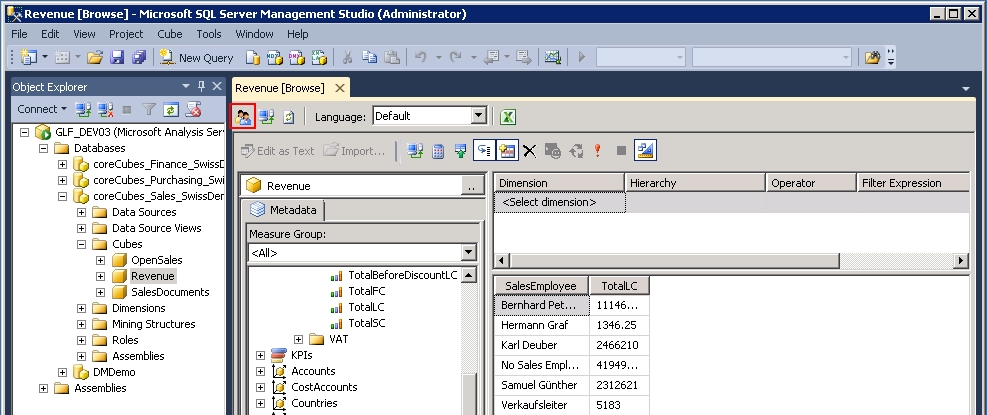
In the management studio, navigate for example to the Revenue cube, make right-click and choose Browse.
For validating, just select a measure, for example TotalLC and the SalesEmployee dimension:
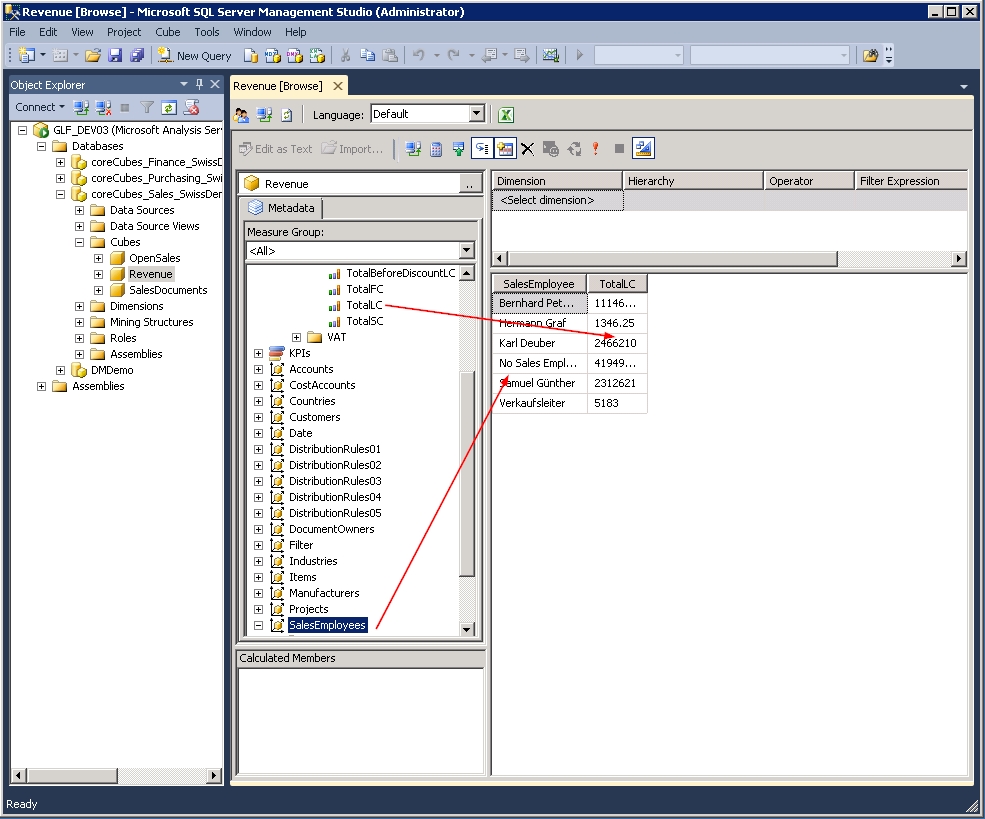
Now, there is no restriction. The data is shown without any role. Let’s test, how Bernhard Peterhans would see his data, when connecting for example via Excel. To test it, click the button Change User in the top left:
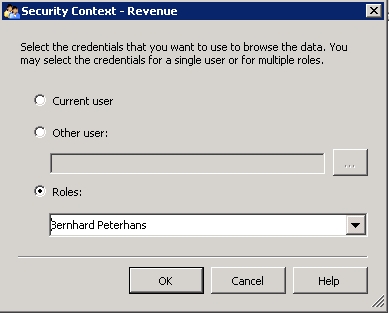
Now it is possible to select a windows user or just the role. To be 100% sure, that everything is correct, please test with the windows user. On my test environment, I test with the role.
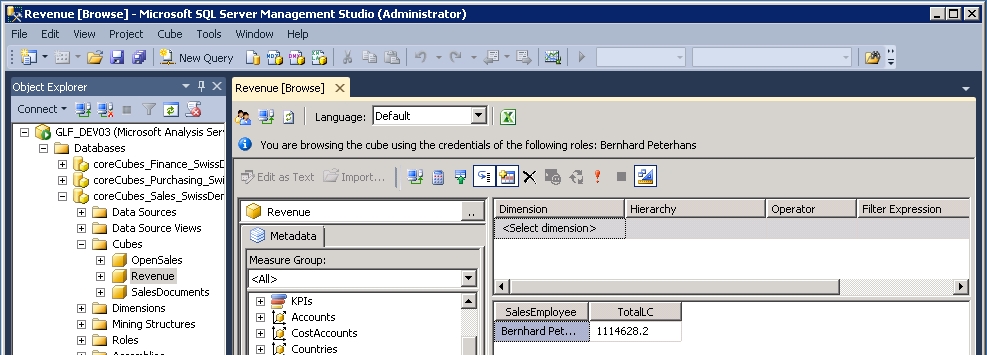
Now, it is necessary to re-connect. The result shows that the dimension security is applied. The sales employee would only see his data. Also the value is correct, because we defined Enable Visual Totals in the dimension security.
Important: After updating a later version of coresuite cube via the coresuite administration and the installation wizard, it is necessary to setup the roles again.
0 Comments